
Using PowerShell with APIs to Generate Let's Encrypt SSL Certs with CloudFlare or GoDaddy DNS
Lets Encrypt has (https://letsencrypt.org/2020/02/27/one-billion-certs.html) since starting out and has all but ended any reason for not having trusted SSL certificates installed on test/dev, lab or non-production systems. I even know instances where they front production systems. Over the years i’ve pretty much been one of those people that don’t care either way if I have to allow an untrusted cert on my lab systems and applications. In fact, if I am being 100% honest, I still don’t mind it… but I know that there is somewhat of a religious element when it comes to the subject, so i’ll leave it at that.
I previously blogged about how to apply Lets Encrypt SSL Certs to a vCloud Director Keystore using the ACMESharp PowerShell Module. That method was around for a while and I was leveraging a manual DNS challenge mechanism to authenticate the certificate request. When I went back to provision a new SSL Cert the same way I found that it wasn’t working and that that project had been decommissioned.
Enter Posh-ACME
Posh-ACME is an ACME v2 (RFC 8555) client implemented as a Windows PowerShell module that enables you to generate publicly trusted SSL/TLS certificates from an ACME capable certificate authority such as Let’s Encrypt. With the new PowerShell Module for ACME SSL certificates can be requested, approved and downloaded in about two minutes! Let’s put that into some perspective… back when I first starting working in the hosting industry and SSL certificate procurement process was expensive, complex and very time consuming. Sometimes is took days for the SSL to be approved. This was more about the Certificate Authorities at the time and the grip on the market they had at the time, but it is amazing to think that there has been a level of disruption in the SSL industry such that they are now freely available and able to be procured in literal minutes. With the power of automation we can leverage the PowerShell Module which in turn leverages API accessibility to a number of trusted DNS Providers in the form of a DNS plugin for Posh-ACME.
Setting Up CloudFlare/GoDaddy Access Keys
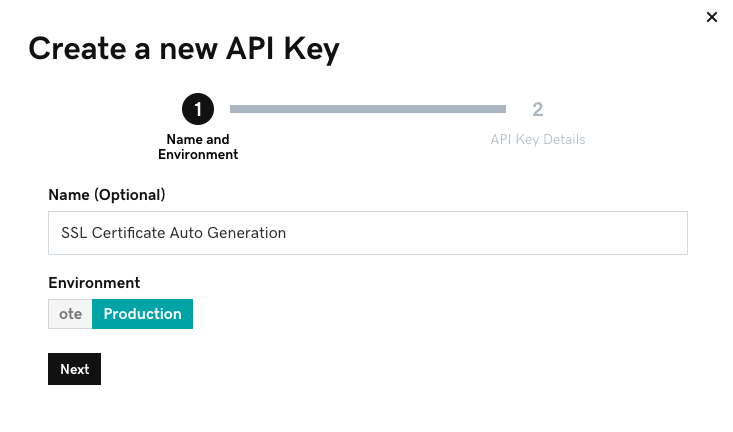
As mentioned above, there are a number of (https://github.com/rmbolger/Posh-ACME/tree/master/Posh-ACME/DnsPlugins). In this example i’m using CloudFlare (Free DNS Hosting) and GoDaddy. For Posh-ACME to perform the necessary challenges for Domain Validation we need to generate an API Tokens and keys which allow us to insert DNS entries for the validation process.
For CloudFlare
In the API Tokens section, click Create Token, Give it a name such as ‘DNS edit all zones’ and add the following permissions:
- Zone - DNS - Edit
- Zone - Zone - Read
Set the following Zone Resources:
- Include - All Zones
- Click Continue to summary
Click Create Token and copy it as it a one time action. If you loose this token you will have to generate a new value.
For GoDaddy
To do so go to: developer.godaddy.com/keys and create a key/secret pair.
Using Posh-ACME to Generate New SSL Certificates
The process to generate the new SSL certificate is very simple and is shown in the steps below using a GoDaddy hosted domain. It’s essentially a four step process, of which the PowerShell Module is doing all the heavy lifting, talking to the APIs of the DNS provider. The last part below is an example of what is required to extract the PFX password from the command if not set in the New-PACertificate command.
For GoDaddy
PS C:\Users\anthony.spiteri> Set-PAServer "LE_Prod"

PS C:\Users\anthony.spiteri> $pArgs = @{GDKey="<KEY>";GDSecret="<SECRET>"}

PS C:\Users\anthony.spiteri> New-PACertificate vcd.aperaturelabs.biz -FriendlyName vcd.aperaturelabs.biz -PfxPass password01 -AcceptTOS -Contact [email protected] -DnsPlugin GoDaddy -PluginArgs $pArgs PS C:\Users\anthony.spiteri> $pArgs = @{GDKey="";GDSecret=""} PS C:\Users\anthony.spiteri> New-PACertificate vcd.aperaturelabs.biz -FriendlyName vcd.aperaturelabs.biz -PfxPass password01 -AcceptTOS -Contact [email protected] -DnsPlugin GoDaddy -PluginArgs $pArgs

Subject NotAfter KeyLength Thumbprint AllSANs
------- -------- --------- ---------- -------
CN=vcd.aperaturelabs.biz 12/9/2020 5:34:24 PM 2048 D2D6BDDF9EC5ECB9FEC59D720DF13A433F9D6981 {vcd.aperaturelabs.biz}

PS C:\Users\anthony.spiteri> Get-PACertificate | fl *

Subject : CN=vcd.aperaturelabs.biz
NotBefore : 9/10/2020 5:34:24 PM
NotAfter : 12/9/2020 5:34:24 PM
KeyLength : 2048
Thumbprint : D2D6BDDF9EC5ECB9FEC59D720DF13A433F9D6981
AllSANs : {vcd.aperaturelabs.biz}
CertFile : C:\Users\anthony.spiteri\AppData\Local\Posh-ACME\acme-v02.api.letsencrypt.org\94923460\vcd.aperaturelabs.biz\cert.cer
KeyFile : C:\Users\anthony.spiteri\AppData\Local\Posh-ACME\acme-v02.api.letsencrypt.org\94923460\vcd.aperaturelabs.biz\cert.key
ChainFile : C:\Users\anthony.spiteri\AppData\Local\Posh-ACME\acme-v02.api.letsencrypt.org\94923460\vcd.aperaturelabs.biz\chain.cer
FullChainFile : C:\Users\anthony.spiteri\AppData\Local\Posh-ACME\acme-v02.api.letsencrypt.org\94923460\vcd.aperaturelabs.biz\fullchain.cer
PfxFile : C:\Users\anthony.spiteri\AppData\Local\Posh-ACME\acme-v02.api.letsencrypt.org\94923460\vcd.aperaturelabs.biz\cert.pfx
PfxFullChain : C:\Users\anthony.spiteri\AppData\Local\Posh-ACME\acme-v02.api.letsencrypt.org\94923460\vcd.aperaturelabs.biz\fullchain.pfx
PfxPass : System.Security.SecureString

PS C:\Users\anthony.spiteri> $cert = Get-PACertificate
PS C:\Users\anthony.spiteri> $cert.PfxPass
System.Security.SecureString

PS C:\Users\anthony.spiteri> [System.Runtime.InteropServices.Marshal]::PtrToStringAuto([System.Runtime.InteropServices.Marshal]::SecureStringToBSTR($cert.PfxPass))
password01
For CloudFlare
PS C:\Users\anthony.spiteri> Set-PAServer "LE_Prod"

PS C:\Users\anthony.spiteri\ $secToken = Read-Host -AsSecureString -Prompt 'API Token'
API Token: **************************

PS C:\Users\anthony.spiteri> $pArgs = @{ CFToken = $secToken }

PS C:\Users\anthony.spiteri> New-PACertificate vcd.aperaturelabs.biz -FriendlyName vcd.aperaturelabs.biz -PfxPass password01 -AcceptTOS -Contact [email protected] -DnsPlugin CloudFlare -PluginArgs $pArgs PS C:\Users\anthony.spiteri> $pArgs = @{GDKey="dLP4WKm9EEds_5P9NpzrKhfYLvVCBPTEAEn";GDSecret="XWa8rY3qMK25hZsfSfPPxi"} PS C:\Users\anthony.spiteri> New-PACertificate vcd.aperaturelabs.biz -FriendlyName vcd.aperaturelabs.biz -PfxPass password01 -AcceptTOS -Contact [email protected] -DnsPlugin GoDaddy -PluginArgs $pArgs

Subject NotAfter KeyLength Thumbprint AllSANs
------- -------- --------- ---------- -------
CN=vcd.aperaturelabs.biz 12/9/2020 5:34:24 PM 2048 D2D6BDDF9EC5ECB9FEC59D720DF13A433F9D6981 {vcd.aperaturelabs.biz}

PS C:\Users\anthony.spiteri> Get-PACertificate | fl *

Subject : CN=vcd.aperaturelabs.biz
NotBefore : 9/10/2020 5:34:24 PM
NotAfter : 12/9/2020 5:34:24 PM
KeyLength : 2048
Thumbprint : D2D6BDDF9EC5ECB9FEC59D720DF13A433F9D6981
AllSANs : {vcd.aperaturelabs.biz}
CertFile : C:\Users\anthony.spiteri\AppData\Local\Posh-ACME\acme-v02.api.letsencrypt.org\94923460\vcd.aperaturelabs.biz\cert.cer
KeyFile : C:\Users\anthony.spiteri\AppData\Local\Posh-ACME\acme-v02.api.letsencrypt.org\94923460\vcd.aperaturelabs.biz\cert.key
ChainFile : C:\Users\anthony.spiteri\AppData\Local\Posh-ACME\acme-v02.api.letsencrypt.org\94923460\vcd.aperaturelabs.biz\chain.cer
FullChainFile : C:\Users\anthony.spiteri\AppData\Local\Posh-ACME\acme-v02.api.letsencrypt.org\94923460\vcd.aperaturelabs.biz\fullchain.cer
PfxFile : C:\Users\anthony.spiteri\AppData\Local\Posh-ACME\acme-v02.api.letsencrypt.org\94923460\vcd.aperaturelabs.biz\cert.pfx
PfxFullChain : C:\Users\anthony.spiteri\AppData\Local\Posh-ACME\acme-v02.api.letsencrypt.org\94923460\vcd.aperaturelabs.biz\fullchain.pfx
PfxPass : System.Security.SecureString

PS C:\Users\anthony.spiteri> $cert = Get-PACertificate
PS C:\Users\anthony.spiteri> $cert.PfxPass
System.Security.SecureString

PS C:\Users\anthony.spiteri> [System.Runtime.InteropServices.Marshal]::PtrToStringAuto([System.Runtime.InteropServices.Marshal]::SecureStringToBSTR($cert.PfxPass))
password01
As you can see above, all the files are downloaded locally to be imported and used where required.
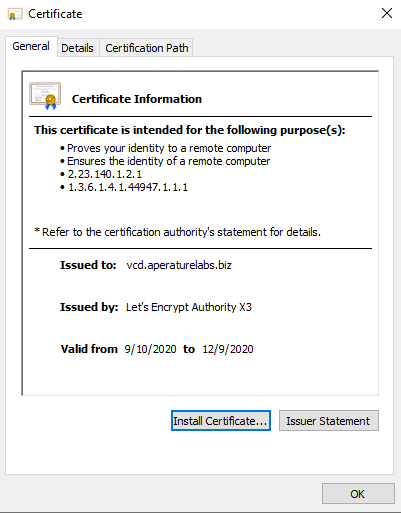 A small reminder, that all Let’s Encrypt SSL certificated only a valid for 90 days… this is the obvious trade off of the free initiative.
https://github.com/rmbolger/Posh-ACME#install
A small reminder, that all Let’s Encrypt SSL certificated only a valid for 90 days… this is the obvious trade off of the free initiative.
https://github.com/rmbolger/Posh-ACME#install
1 Commentarchived