Install and Configure oVIRT for KVM Homelab - Part 1
At VeeamON, we announced that Veeam would soon (https://anthonyspiteri.net/veeam-backup-for-rhv/). In a subsequent post, I wrote down some of the observations I had seen over the past few months talking to customers and partners who have chosen to go down the KVM/Red Hat Virtualisation path also outlining some of the improvements with the a quickly maturing KVM virtualisation stack. At the centre of that stack is HostedEngine, which powers oVIRT. This is what is driving the uptick in KVM interest. At the time, I had got working a homelab single host instance of KVM with oVIRT up and running for some labbing, but is was a very painful experience to say the least. With that, I wanted to revisit the install and document the steps taken to get to a working NestedESXi lab environment. This was going to be a single post, but have decided to split it into two posts
Platform Management and Automation via oVirt
oVirt is like the VMware Cloud Director of this KVM/RHV world… it certainly has a long long way to go to compete with VCD, but the ground work and features are there in the current 4.4.6 release. This open source project matches closely with version of RHV and KVM and is the glue that puts the underlying RHV layer together in a consumable way for enterprises and service providers.
oVirt is an open-source distributed virtualization solution, designed to manage your entire enterprise infrastructure. oVirt uses the trusted KVM hypervisor and is built upon several other community projects, including libvirt, Gluster, PatternFly, and Ansible.
Some basic features include:
- Rich web-based user interfaces for both admin and non-admin users
- Integrated management of hosts, storage, and network configuration
- Live migration of virtual machines and disks between hosts and storage
- High availability of virtual machines in the event of host failure
Prepping CentOS 8 as KVM Host:
As with any NestedESXi lab, there are a few tricks to prepping the Guest VM that is to be used as the KVM host. I’ve used CentOS 8 as the base operating system and created a simple template with a minimal install ready to go.
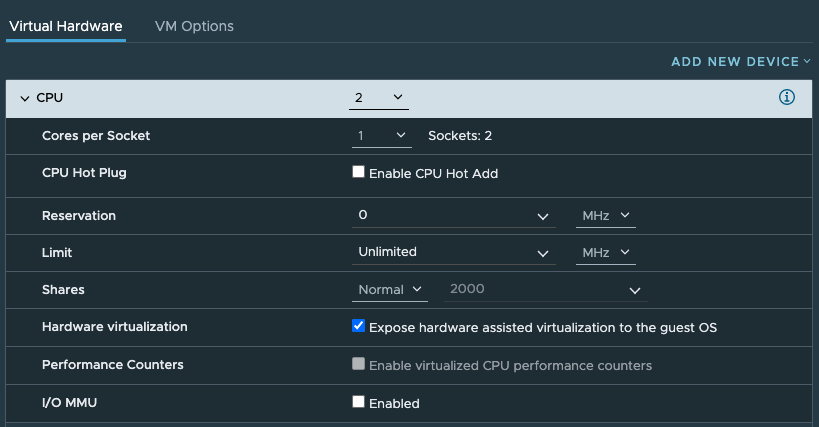
CPU and Memory Requirements:
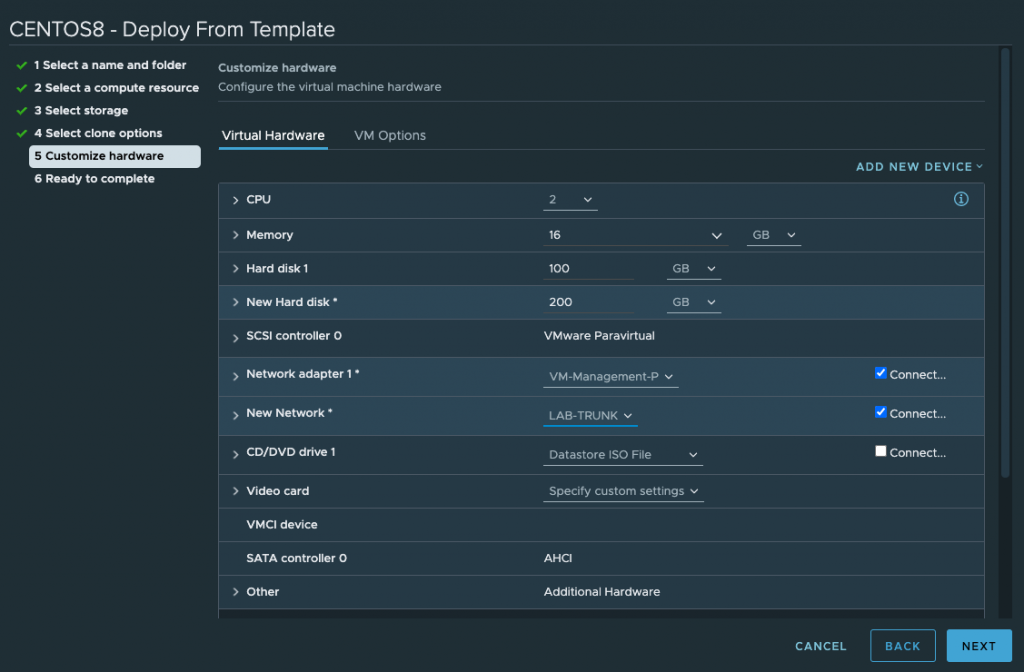
The only thing to remember is to turn on Hardware virtulization under the CPU section of the VMs Virtual Hardware section. RAM is pretty straight forward here, but the HostedEngine VM is recommended to have at least 14GB of memory, and you want enough room to be able to run Nested Guest VMs within the KVM host… for this reason, I went with 32GB of RAM.
 If you haven’t done this, then you won’t see anything returned if you run a cat /proc/cpuinfo | egrep “vmx|svm” as shown below.
 Once this is confirmed, to enable KVM run the following to enable things as well as install some additional tooling.
# yum install @virt
# systemctl enable --now libvirtd
# yum -y install virt-top libguestfs-tools
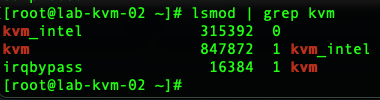
# lsmod | grep kvmThat last command should show the following.
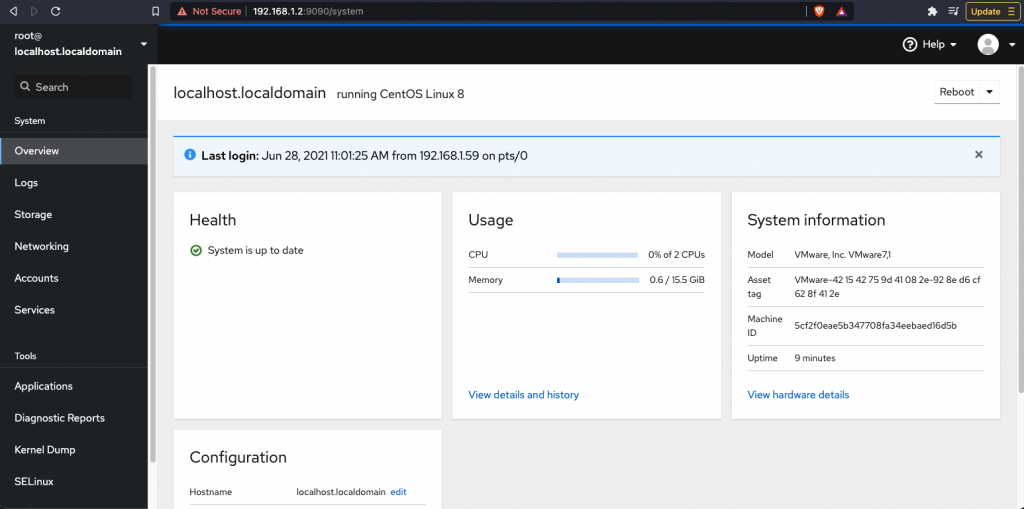
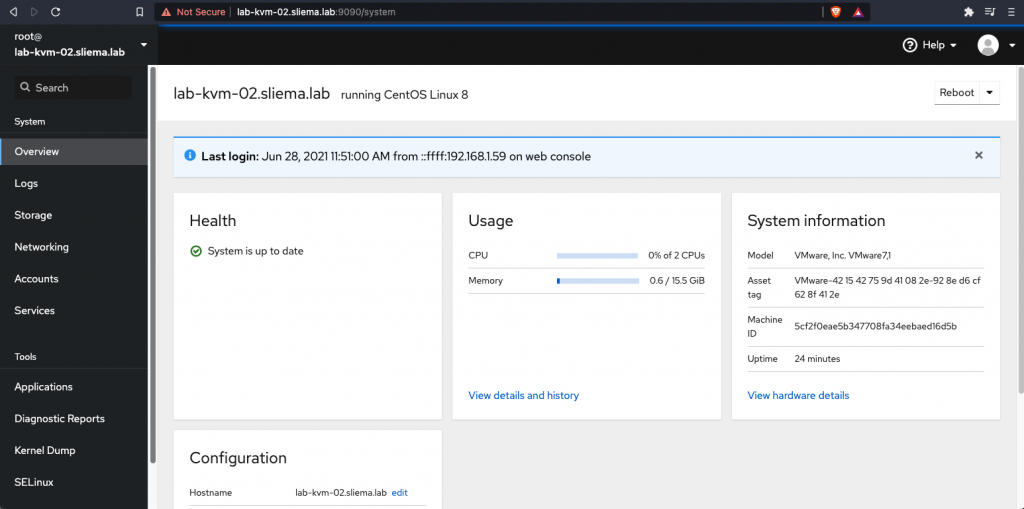
Cockpit Configuration:
Cockpit was already deployed with the CentOS 8 Server minimal install I chose. The final step was for it to be enabled. The command is given to you when you SSH into the server as shown below. Further to that, I ran a couple of commands to ensure the firewall was configured correctly.
# systemctl enable --now cockpit.socket
# firewall-cmd --add-service=cockpit
# firewall-cmd --add-service=cockpit --permanent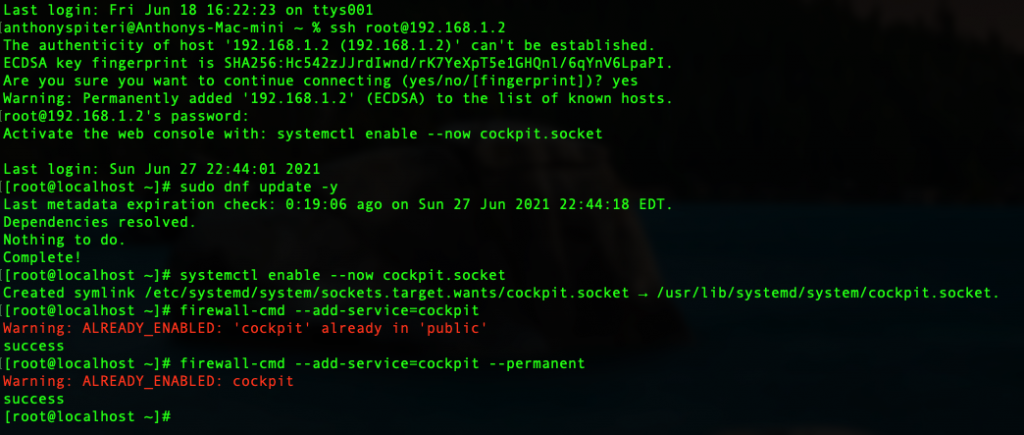 From there, Cockpit should be accessible via port 9090
DNS and Hostname Config:
From Cockpit, I configured a new IP Address for the KVM host and added the DNS search domain of my lab.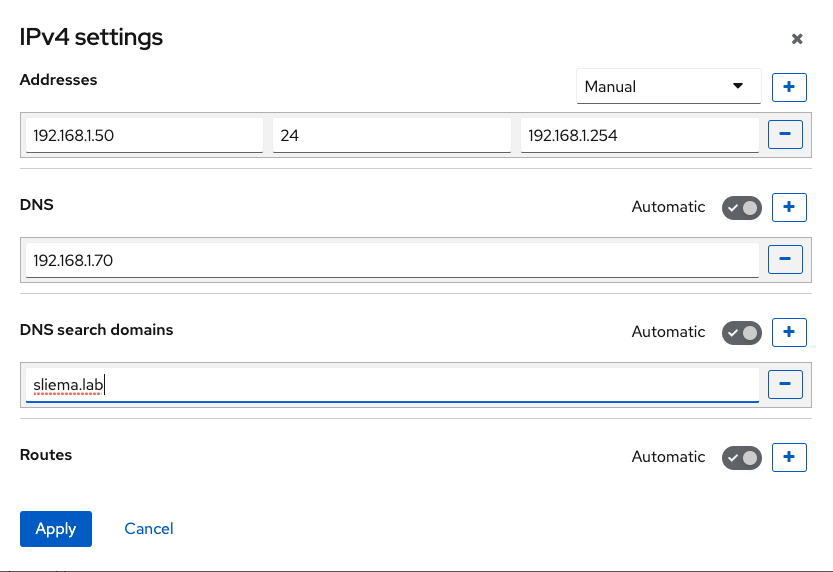 Forward and reverse DNS entries are crucial in a successful HostedEngine/oVIRT as well as the correct hosts file entries on the KVM host where HostedEngine will be deployed to. Pre-configuring IP addresses and FQDNs is an important step, and I setup DNS to reflect this.
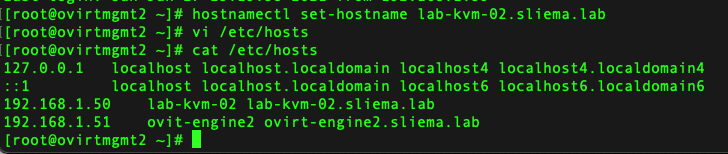
 From here, I set the hostname with a resolvable FQDN
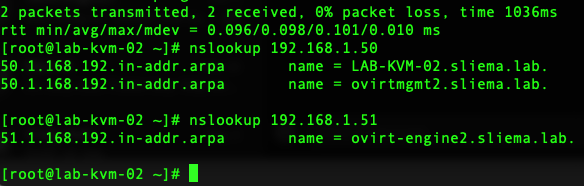
 And tested out forward and reverse lookups
 Cockpit should reflect the correct hostname as well
Storage:
The CentOS 8 template was configured with a 100GB primary partition that was automatically configured by the installer. When deploying the template I added a new disk which will act as the NFS data mount for oVIRT and HostedEngine. Once the secondary partition has been created, the follow steps need to be taken to install an NFS Server (remembering this is a self hosted all in one lab setup)
# yum -y install nfs-utils
Last metadata expiration check: 0:10:16 ago on Mon 28 Jun 2021 00:17:34 EDT.
Package nfs-utils-1:2.3.3-41.el8.x86_64 is already installed.
Dependencies resolved.
Nothing to do.
Complete!

# systemctl enable --now nfs-server rpcbind
Created symlink /etc/systemd/system/multi-user.target.wants/nfs-server.service → /usr/lib/systemd/system/nfs-server.service.

# getent group kvm || sudo groupadd kvm -g 36
kvm:x:36:qemu

# getent passwd vdsm || sudo useradd vdsm -u 36 -g 36

# mkdir -p /nfs/exports/ovirt/{data,iso,export}

# chown -R 36:36 /nfs/exports/ovirt/data
# chown -R 36:36 /nfs/exports/ovirt/iso
# chown -R 36:36 /nfs/exports/ovirt/export

# chmod 0775 /nfs/exports/ovirt/data
# chmod 0775 /nfs/exports/ovirt/iso
# chmod 0775 /nfs/exports/ovirt/export

# vi /etc/exports
###### PASTE THE FOLLOWING AND SAVE
/nfs/exports/ovirt/data *(rw,anonuid=36,anongid=36,all_squash)
/nfs/exports/ovirt/iso *(rw,anonuid=36,anongid=36,all_squash)
/nfs/exports/ovirt/export *(rw,anonuid=36,anongid=36,all_squash)

# systemctl restart nfs-server
# systemctl enable nfs-server

# exportfs -rvv
exporting *:/nfs/exports/ovirt/export
exporting *:/nfs/exports/ovirt/iso
exporting *:/nfs/exports/ovirt/data

# firewall-cmd --add-service={nfs,nfs3,rpc-bind} --permanent
success
# firewall-cmd --reload
success
Networking:
Now the hardest part here to wrap your heads around…well… usually. In my first attempt, I really overcomplicated this part. In short, in Part 2 of this post, the core underlying KVM networking is handled by the HostedEngine installation so all that is required at this stage is the basic networking config we have set above. However, as with running any NestedESXi hyper-visor, I have found that you need to tweak a few of the settings. All that is needed for this self contained KVM host is to put the host on a PortGroup that has Promiscuous Mode enabled. As can be seen below, I have also added a NIC on my labs trunk port, just in case I wanted to configure networking to take advantage of my VLAN configuration. For the purpose of this post, that is not required.
Wrap-Up:
With all that configured, the host has been enabled for KVM virtualisation and all configuration items are in place to run the HostedEngine deployment, which will deploy and configure oVIRT. For that, tune into Part 2. References: https://www.ovirt.org/download/ https://www.ovirt.org/documentation/installing_ovirt_as_a_self-hosted_engine_using_the_cockpit_web_interface/index.html#Deploying_the_Self-Hosted_Engine_Using_Cockpit_install_RHVM
7 Commentsarchived