Install and Configure oVirt for KVM Homelab - Part 2
At VeeamON, we announced that Veeam would soon (https://anthonyspiteri.net/veeam-backup-for-rhv/). In a subsequent post, I wrote down some of the observations I had seen over the past few months talking to customers and partners who have chosen to go down the KVM/Red Hat Virtualisation path also outlining some of the improvements with the a quickly maturing KVM virtualisation stack. At the centre of that stack is HostedEngine, which powers oVIRT. This is what is driving the uptick in KVM interest. At the time, I had got working a homelab single host instance of KVM with oVIRT up and running for some labbing, but is was a very painful experience to say the least. With that, I wanted to revisit the install and document the steps taken to get to a working NestedESXi lab environment. In Part 1, I covered the deployment and configuration of a single host KVM server… this part covers the Hosted Engine install that runs oVIRT.
Installing Hosted Engine:
The oVirt Engine runs as a virtual machine on self-hosted engine nodes (specialized hosts) in the same environment it manages. A self-hosted engine environment requires one less physical server, but requires more administrative overhead to deploy and manage. The Engine is highly available without external HA management.
The minimum setup of a self-hosted engine environment includes one oVirt Engine virtual machine that is hosted on the self-hosted engine nodes. The Engine Appliance is used to automate the installation of an Enterprise Linux 8 virtual machine, and the Engine on that virtual machine. The self-hosted engine installation uses Ansible and the Engine Appliance (a pre-configured Engine virtual machine image) to automate the installation tasks. End to end, this took about 30-40 minutes on my home setup with the VMs living on high speed NVMe datastores. There are a couple of ways to install and configure oVIRT with the Hosted Engine setup. The example below shows how to do it through Cockpit.
Before the oVIRT setup can begin, a few things need to be configured and installed from the KVM Host cli.
# dnf -y install https://resources.ovirt.org/pub/yum-repo/ovirt-release44.rpm

# yum module -y enable javapackages-tools
# yum module -y enable pki-deps
# yum module -y enable postgresql:12

# yum -y update

# dnf -y install cockpit cockpit-ovirt-dashboard gluster-ansible-roles ovirt-engine-appliance
The commands above will add the oVirt rpm to the system, enable a few required packages and tools as well as PostGreSQL.
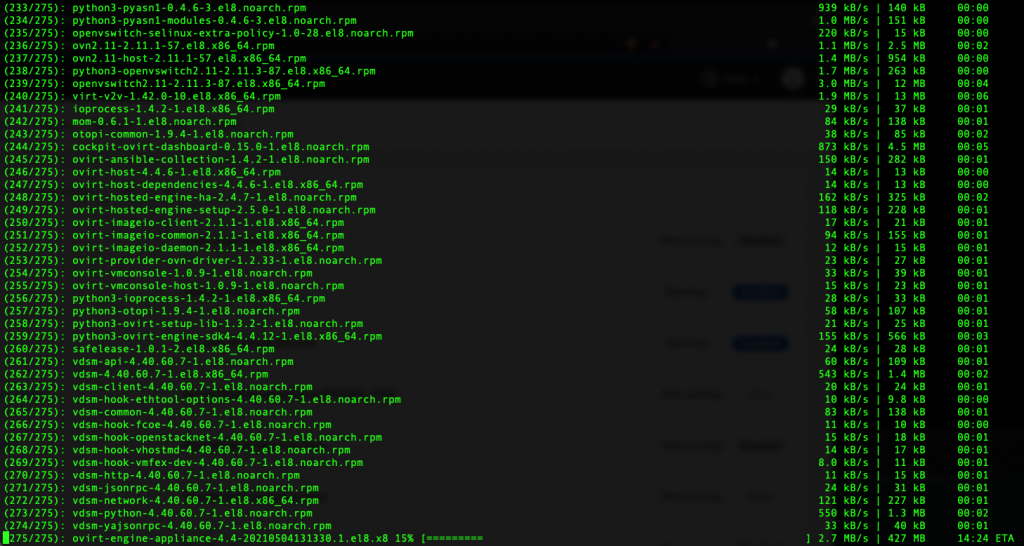 Finally it will add the oVIRT Dashboard to Cockpit and prepare and download the latest ovirt-engine appliance. Once that is done, Cockpit will now show the Virtualization Menu.
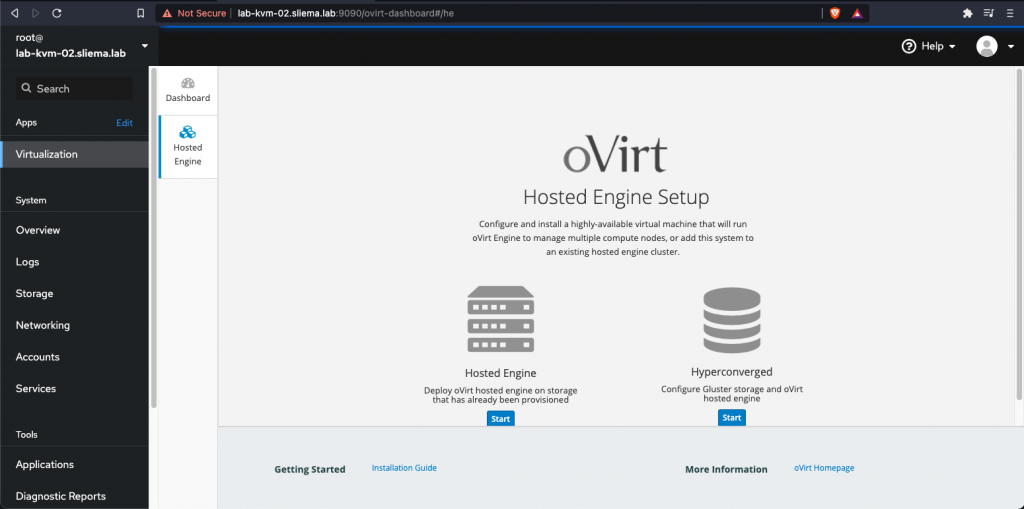 From here, for a self contained KVM host, we chose to Start the Hosted Engine Deployment. Phase 1 lets you configure the Engine VM FQDN, networking details and a number of other settings related to the appliance that gets deployed.
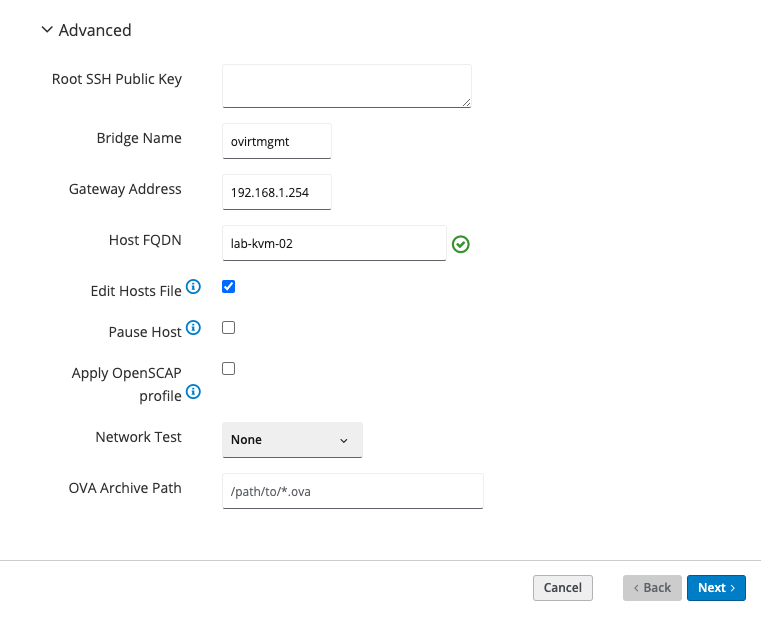
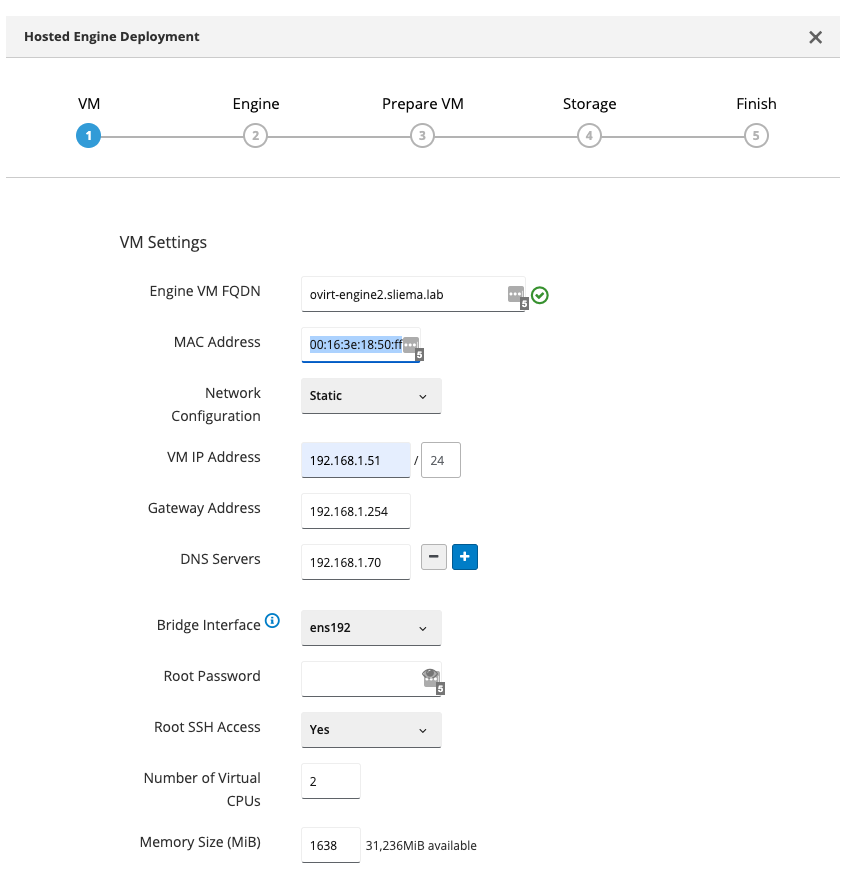 Under Advanced, the only thing that I changed was the Network Test. I moved this to None as it gave me a little trouble in previous installs with other methods. Effectively it will ignore any transient issues during the deployment.
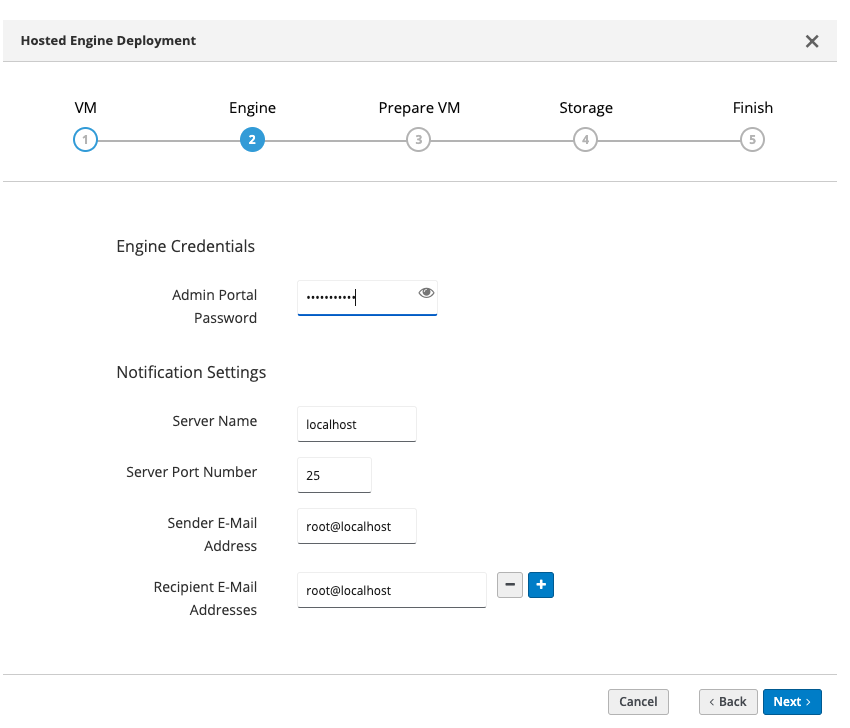
 Phase 2 lets you configure the admin password and any SMTP settings you want to add.
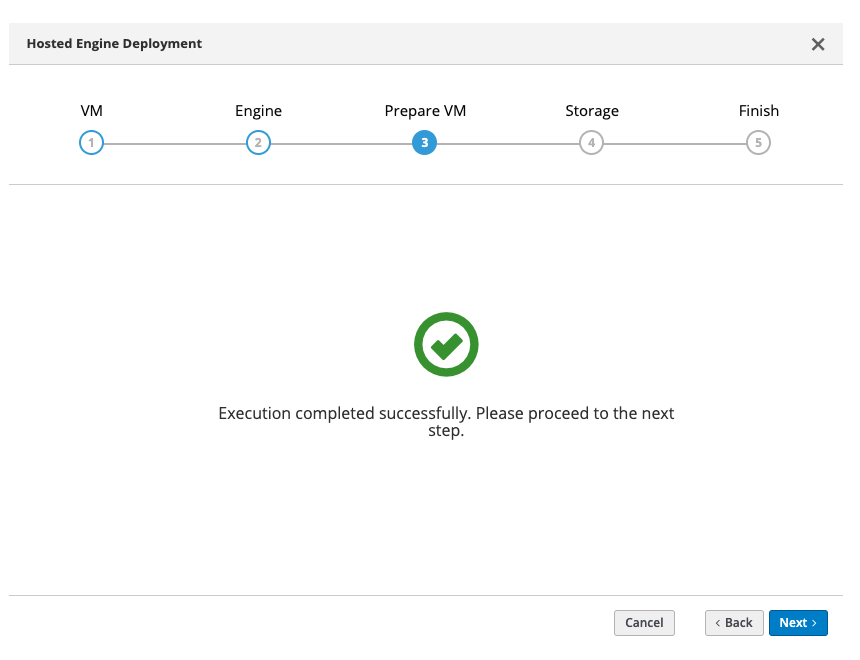
 The next step, Phase 3 is the one that can take some time. Ansible is used to do all the heavy lifting and configuration of the HostedEngine VM. For those that know a little Ansible it is interesting to see the playbooks playing out. Again, this part can take 30-60 minutes depending on your storage and networking. Just to keep track of the progress I have VIRT-TOP open on the KVM Server so see the when the HostedEngine VM was deployed and working hard by monitoring CPU and disk IO.
 Once Phase 3 is complete, we will get a success or failure. In my previous attempts, the failures where mainly due to DNS and networking configuration. This is why, for the lab, the simple networking configuration discussed in Part 1 is chosen.
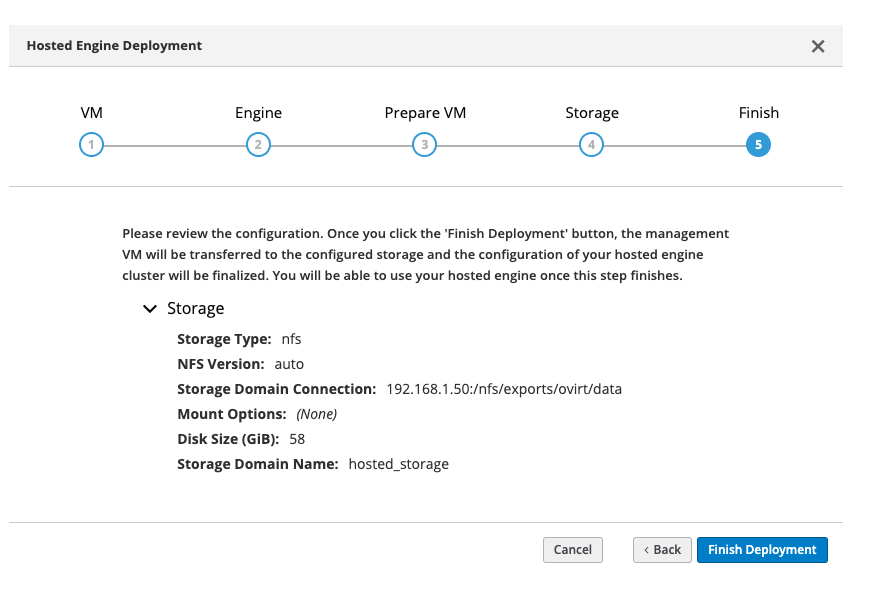
 Phase 4 is the storage configuration. We will use the NFS Export information configured in Part 1. Any issues trying to connect will be shown.
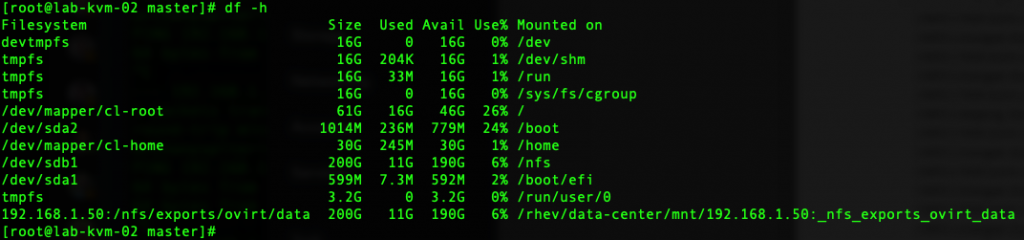
 Once this has been completed, if we go back to the CLI of KVM host it will show the NFS share mounted.
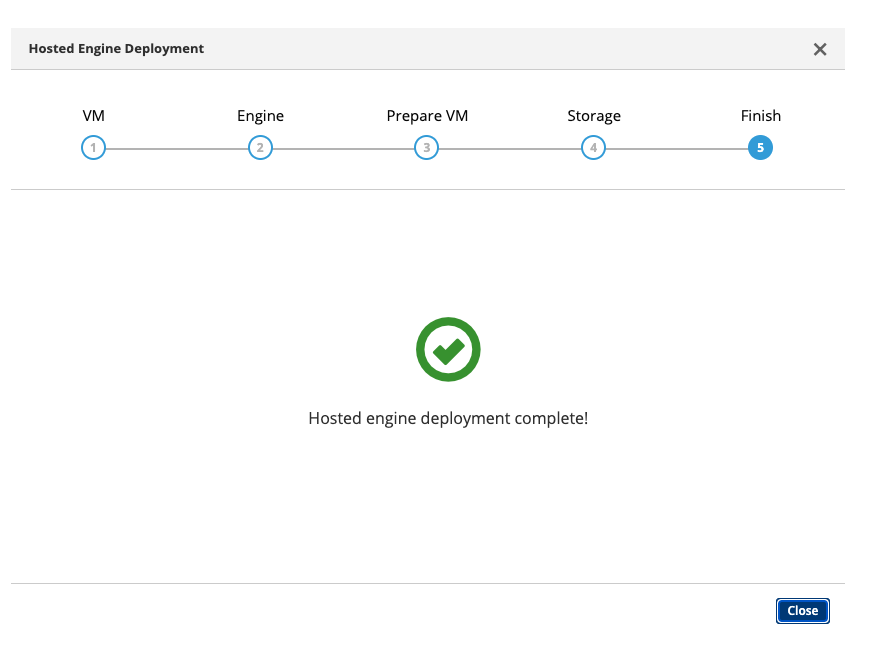
 Once that is done the Hosted Engine Setup is complete
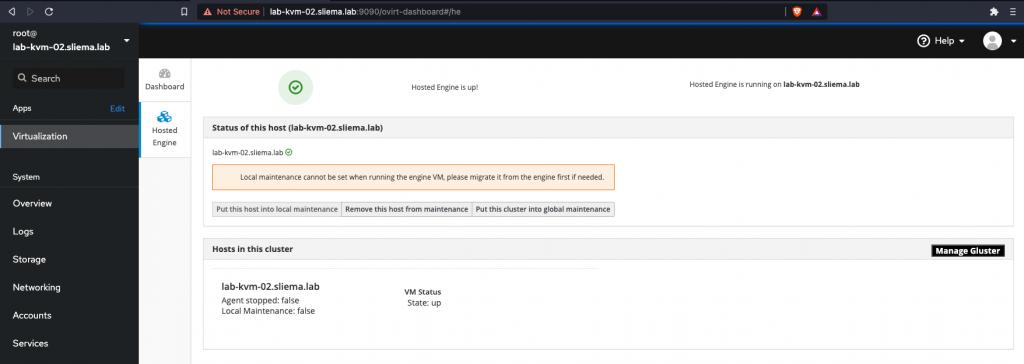
 The status of the Hosted Engine can now be viewed from the Cockpit Virtualization menu. While not required for the purpose of this lab build, there are options here to manage the host/cluster.
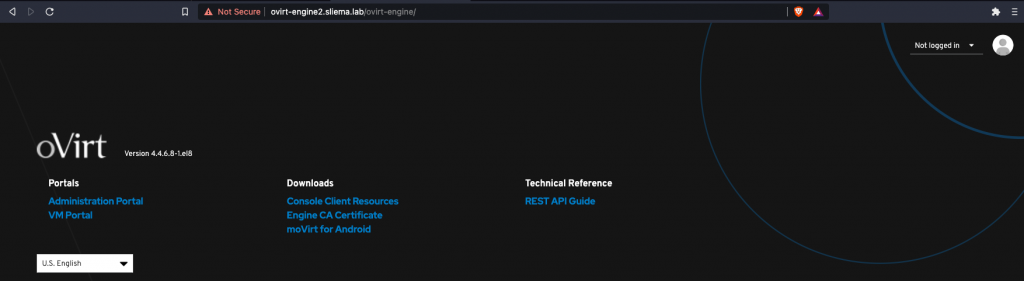
 Opening a new browser tab, oVirt can now be accessed via the FQDN configured. There is the option to login to the Administration Portal or VM Portal
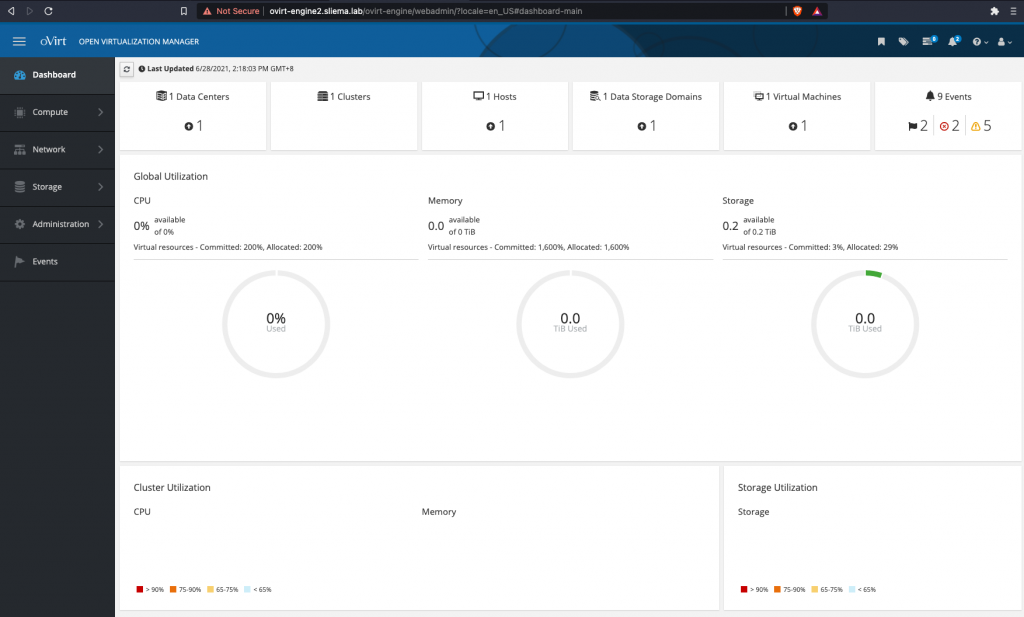
 The Administration Portal is accessible and from here we can start to work on deploying VMs and working with the cluster.
Conclusion:
While this is no were near as straight forward as deploying an ESXi Host and vCenter, the end result still is a single host KVM Cluster overlaid with oVirt for management and configuration. As i’ve mentioned before, KVM has matured, but there is still a fair way to get it as operator friendly as VMware. That said, once the correct pre- requisites are are in place the oVirt install is pretty straight forward from Cockpit. Once installed, we can start deploying VMs into the homelab cluster. As an added bonus, we are now ready to deploy and tinker with Veeam Backup for RHV (not officially supported on CentOS KVM) once that gets released.
References: https://www.ovirt.org/download/ https://www.ovirt.org/documentation/installing_ovirt_as_a_self-hosted_engine_using_the_cockpit_web_interface/index.html#Deploying_the_Self-Hosted_Engine_Using_Cockpit_install_RHVM
3 Commentsarchived