One Click Managed Kubernetes Labs with Platform9
I first blogged about Platform9 all the way back in 2015 after discovering them in 2014 at VMworld… that was around their VMware/KVM and OpenStack solutions at the time… this time around it’s Kubernetes. Platform9 will give you a fully configured and managed Kubernetes single node master cluster within 10 minutes. For lab environments, i’ve come across no better way to start kicking the tyres with Kubernetes quicker and more importantly… outside of the public cloud Kubernetes services, obviously cheaper… and relatively stress free. Kubernetes can pose a steep learning curve for those coming from a more traditional infrastructure background. Its adoption is growing as we know, and there are a lot of IT Operations practitioners scrambling to get up to speed and avoid the FOMO. The success of the public cloud Kubernetes services on GCP, AWS and Azure has meant that if you want to operate a Kubernetes environment you can easily enough deploy a cluster and be somewhat up and running without too much hassle. But what about the on-premises deployments? The problem comes when you want to extend that platform for self service, monitoring and ongoing maintenance. In this open-source world, new versions are are released often, and at many levels of the Kubernetes stack… be that storage, networking or runtimes. This is where Platform9 comes into play:
Platform9 Managed Kubernetes (PMK) is a SaaS-managed Kubernetes offering that makes it easy for you to run Kubernetes on any infrastructure - either on your on-premise data centers or in the public clouds. PMK is deployed using a unique and powerful Software-as-a-Service model, where a cloud hosted management plane remotely deploys, manages, monitors and upgrades your Kubernetes clusters, on-premises or in the public clouds. This deployment model enables us to guarantee 24x7x365 SLA for your Kubernetes environment. PMK is deployed using a unique and powerful Software-as-a-Service model, where our cloud hosted management plane remotely deploys, manages, monitors and upgrades your Kubernetes clusters, on-premises or in the public clouds. Enabling a hassle free container-as-a-service platform.
Kubernetes Cluster Node Setup, Configuration and Deployment:
The walkthrough below, shows how easy it is to setup a Kubernetes cluster on a BareOS.
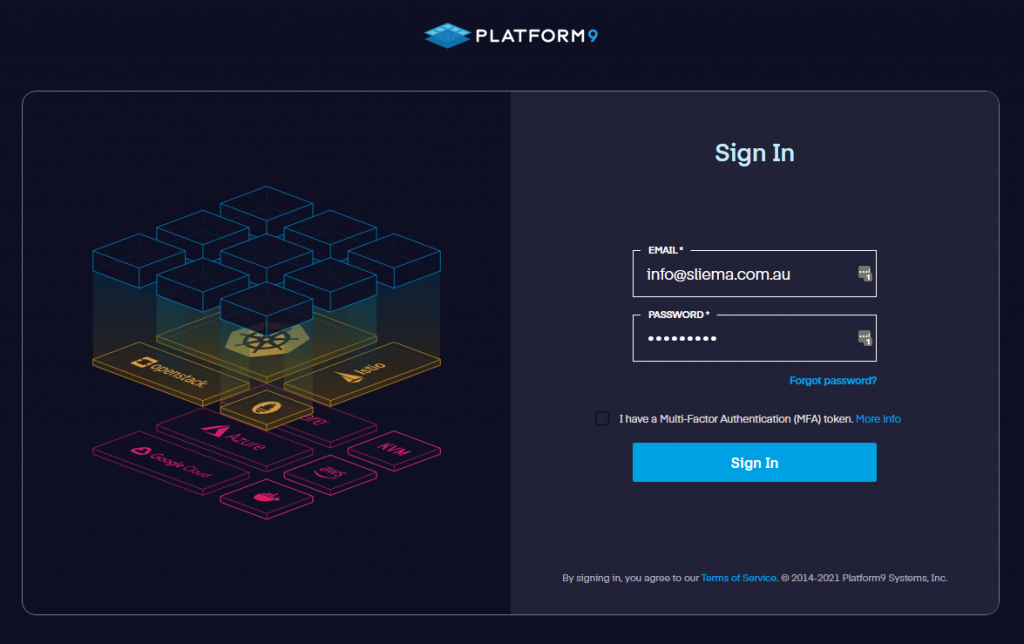
To start with, go through the process of creating a new account on the Platform9 website, go through the set of questions and then log into the web console.
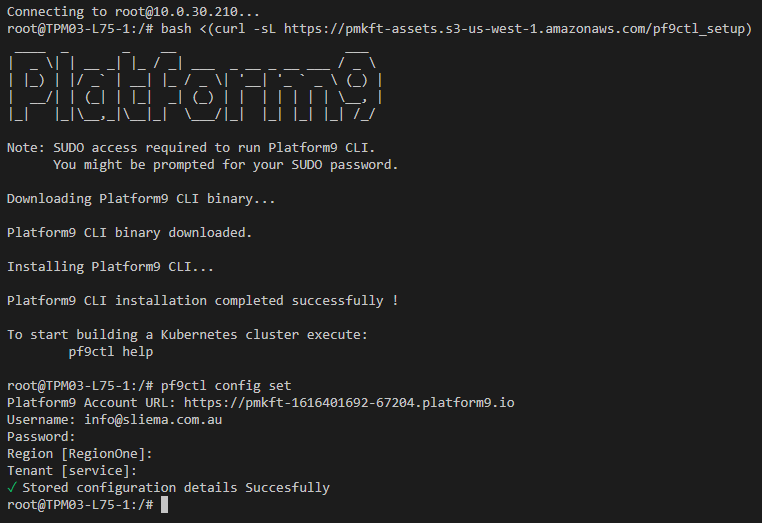
 Firstly, I deployed my Ubuntu 18.04 server to vCenter with Terraform. Good practice is to run an apt-get update/upgrade to get the server up to date with all the latest packages. From there the next step is setup the Platform9 management agent. The pre-requisites for Platform9 are pretty light on as they do almost all the heavy lifting. Onboarding new nodes is done using the PF9 CLI. In order to add a physical or virtual node to your BareOS cluster, you need to first install the Platform9 CLI on that node. All this is well described in the Onboard new Node section of the Web Console… but is done so through a set of three commands as shown below.
 After running the scripts, the final command preps the node.
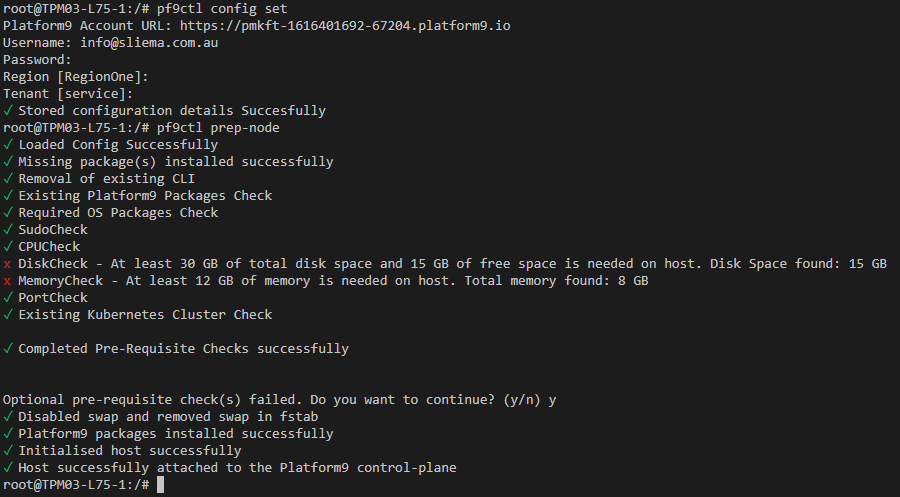 This will run some checks to make sure Platform9 can install Kubernetes on the node. Note that I had disk space and RAM flagged above, but I chose to ignore and continue. My previous Node configurations had the correct requirements as set (https://docs.platform9.com/kubernetes/prerequisites). Once done, the node is Initialised and attached to the Platform9 control plane. At this stage, the node will appear in the Platform9 Web console and is ready for cluster configuration.
 From the Infrastructure and Clusters section after clicking on the Create Cluster button in the top right, there are a couple of options presented with the ability to deploy across not just BareOS, but also AWS and Azure. You can do a true Single-Click install for or go down a slightly more advanced configuration path.
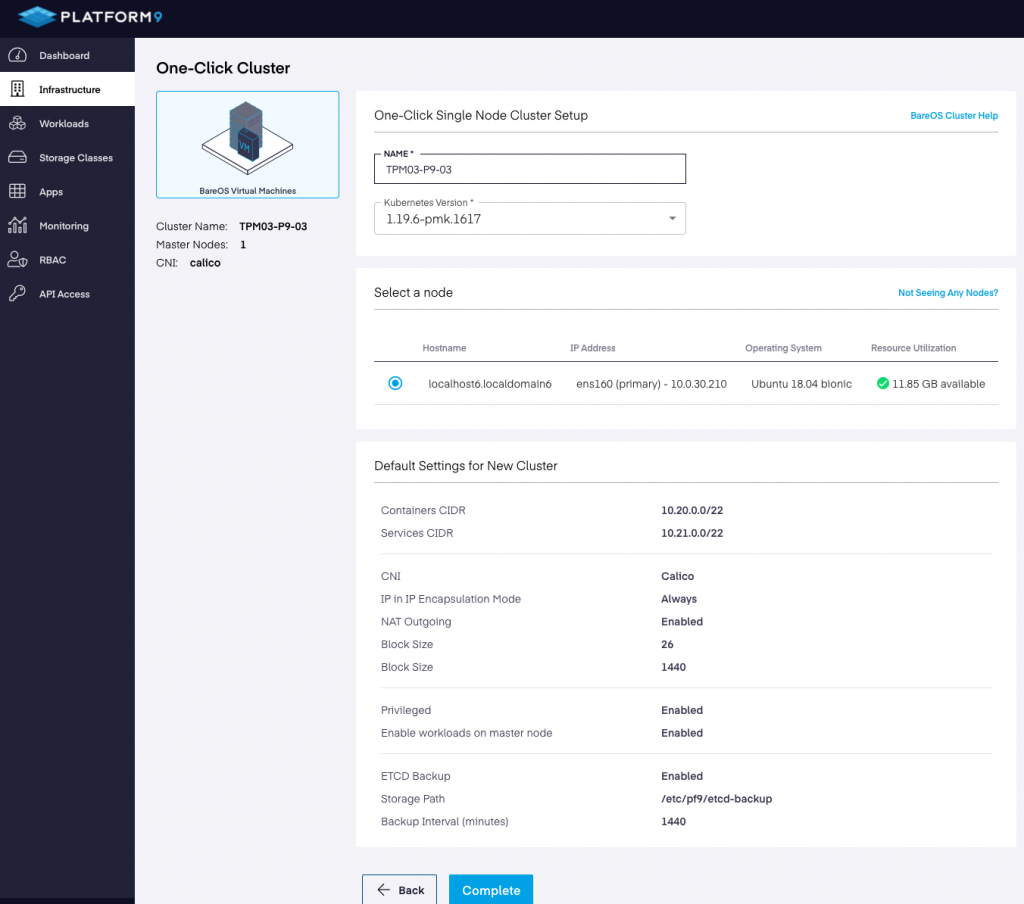
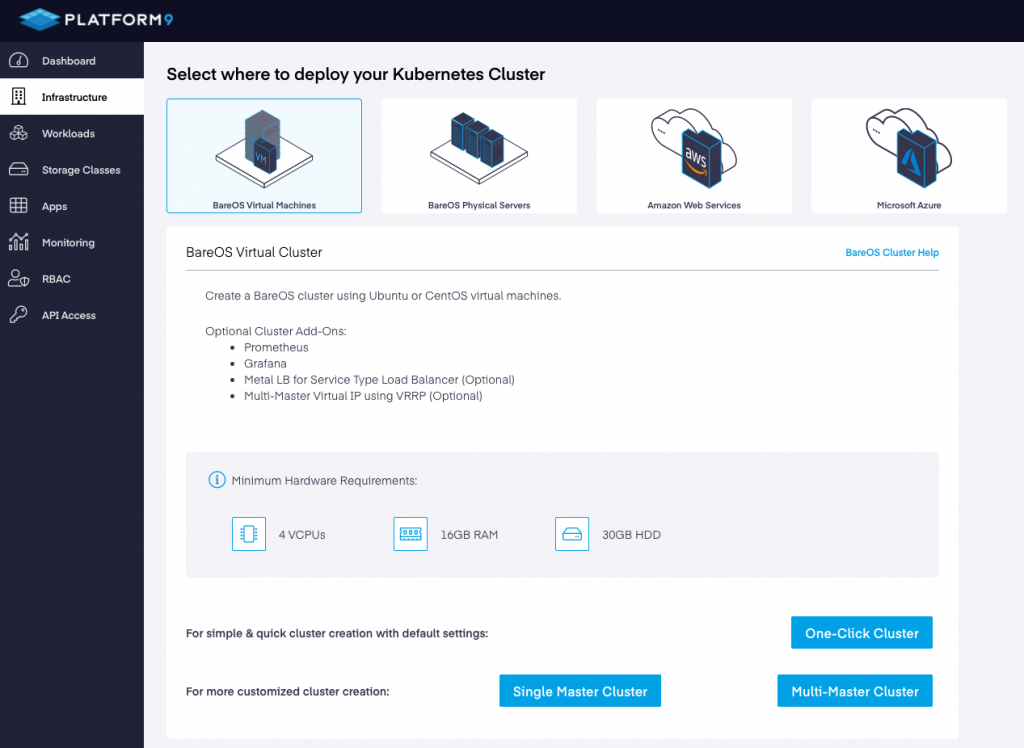 The options for the One-ClickCluster Install below. After entering a Cluster Name, you can select the desired version of Kubernetes from the dropdown. As of writing this, there are three version options of PMK.
 For the rest of this example, i’ve gone with a Single Master Cluster
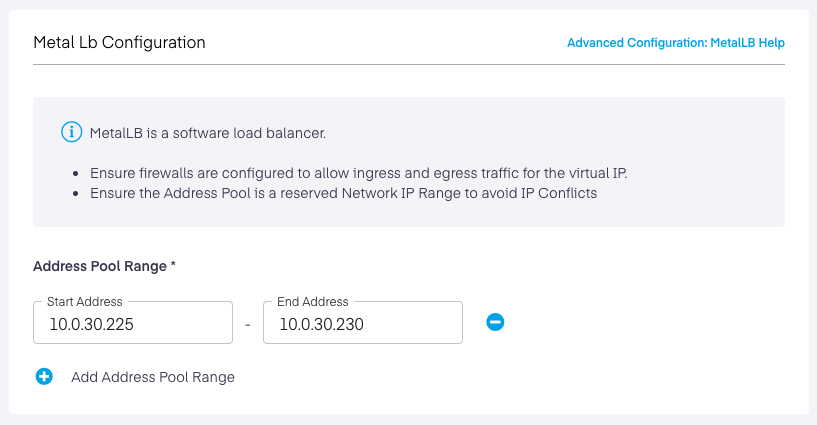
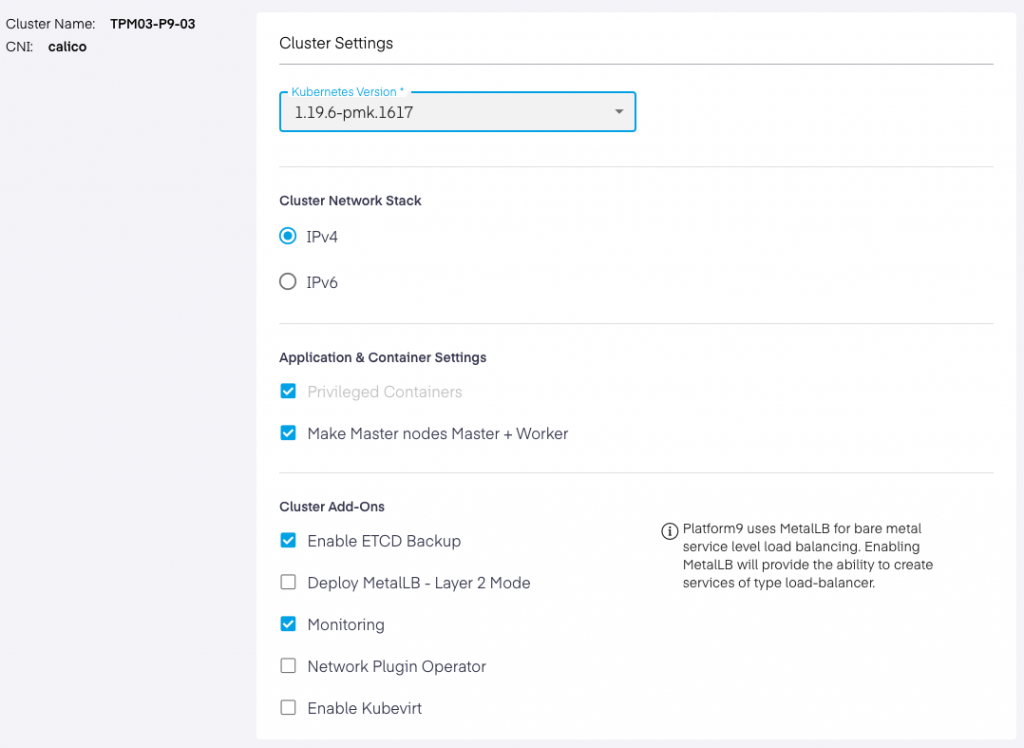 With a MetalLB install done as part of the process. There are more options you can check on/off as part of this installation.
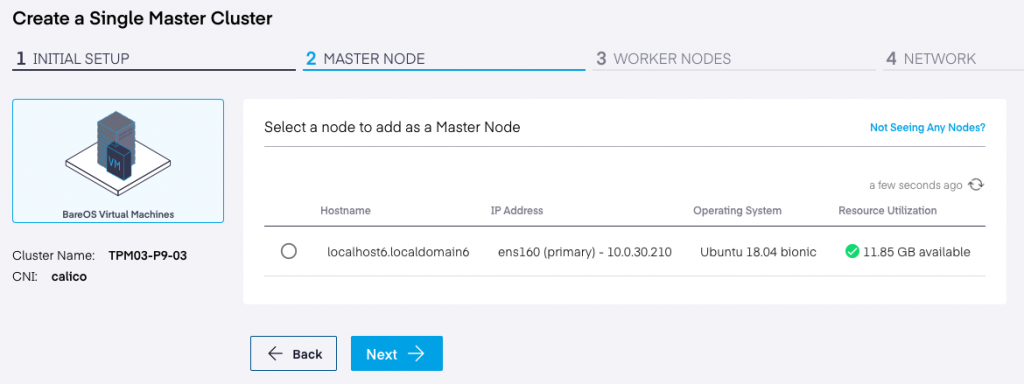
 Next we select the managed Node as the Master. If we have more Nodes prepped by Platform 9 we would add them as Worker Nodes in the next step.
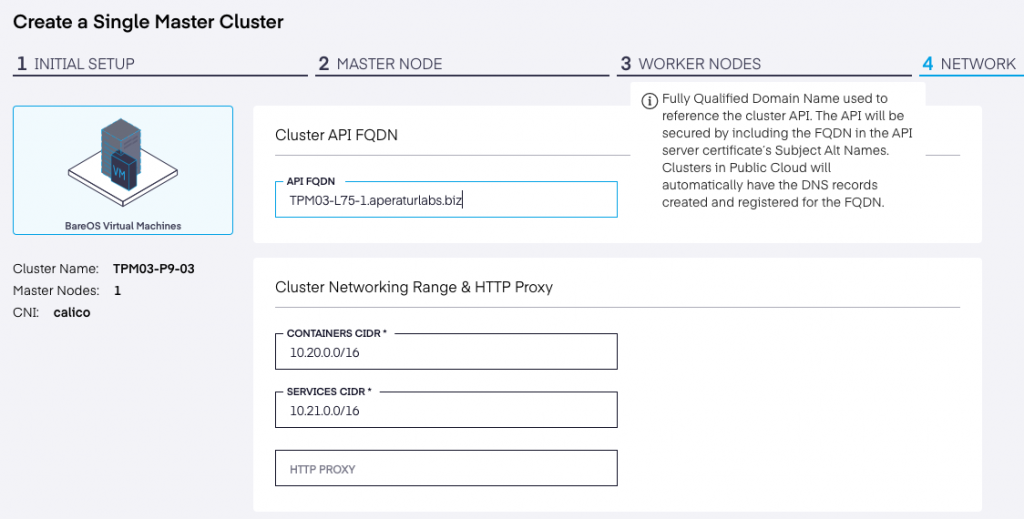
 The next step we need to set the FQDN which must be resolvable from the server.
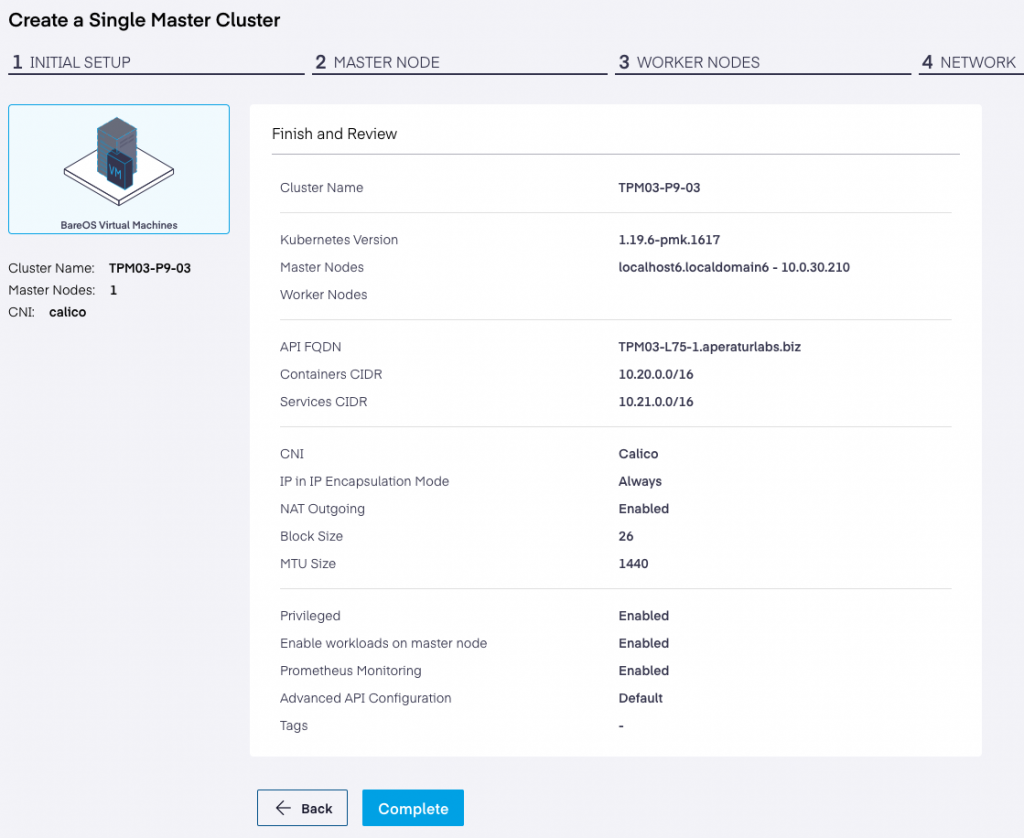
 The API version can be set to a custom version if there is some requirement to do so, otherwise Kubernetes is ready to be installed and configured with the summary of the install shown before moving ahead to complete the setup.
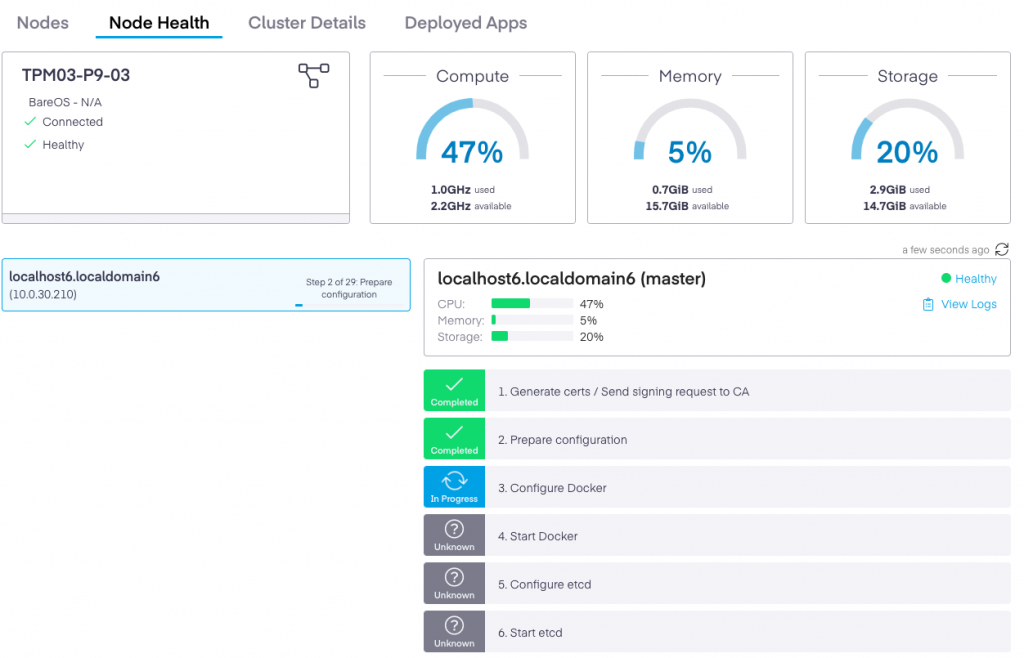
 All going well, the tasks on the install steps on the next page will go through as green and from there we have a fully configured, managed Kubernetes instance to play around in.
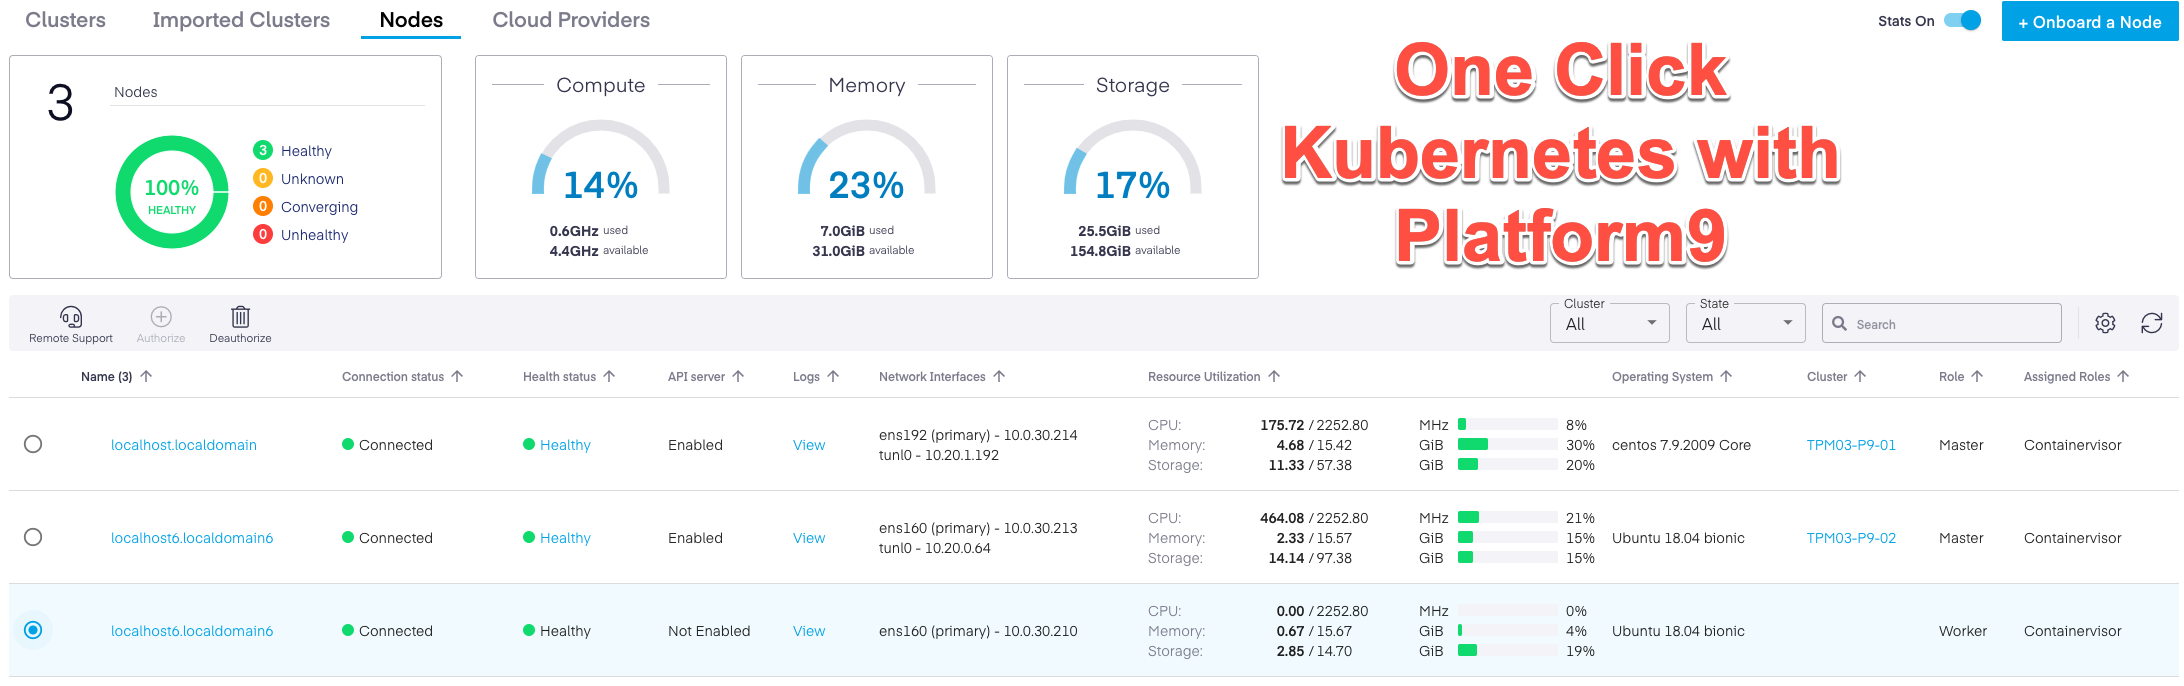
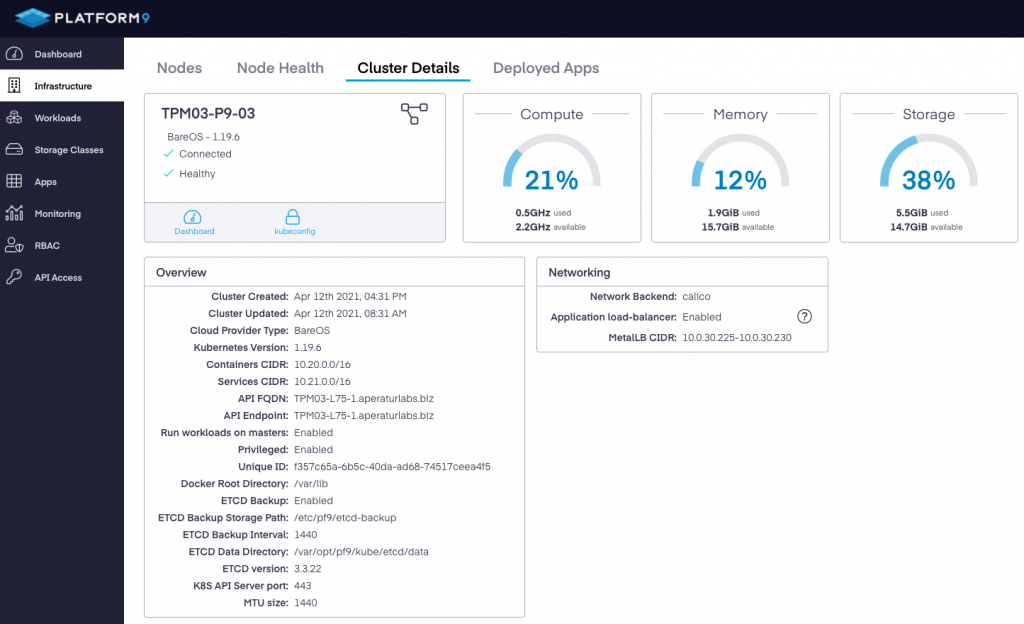
 Once complete, all the details of the Cluster can be seen as shown below
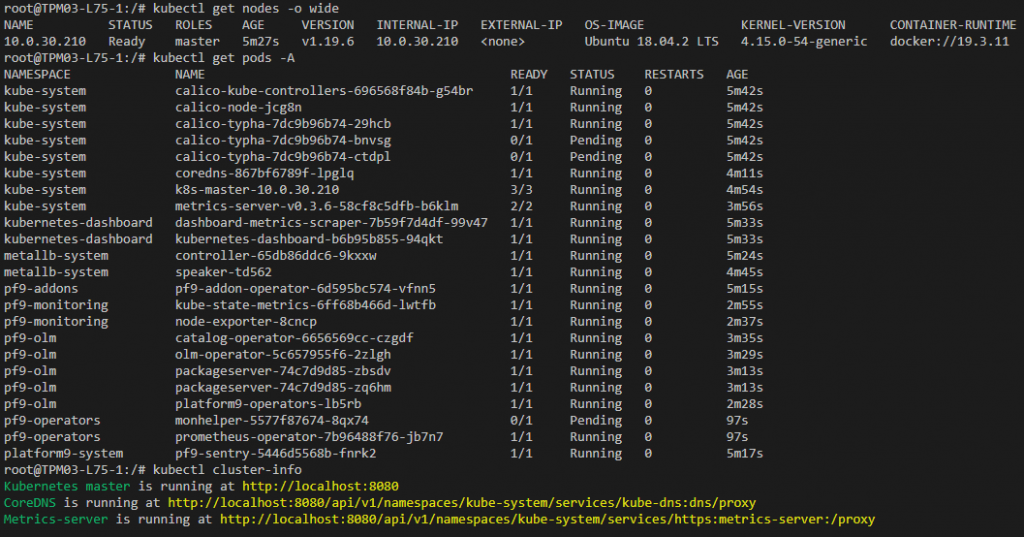
 Heading back to the server CLI, we can see that we have a Single Master Kubernetes node ready with MetalLB deployed
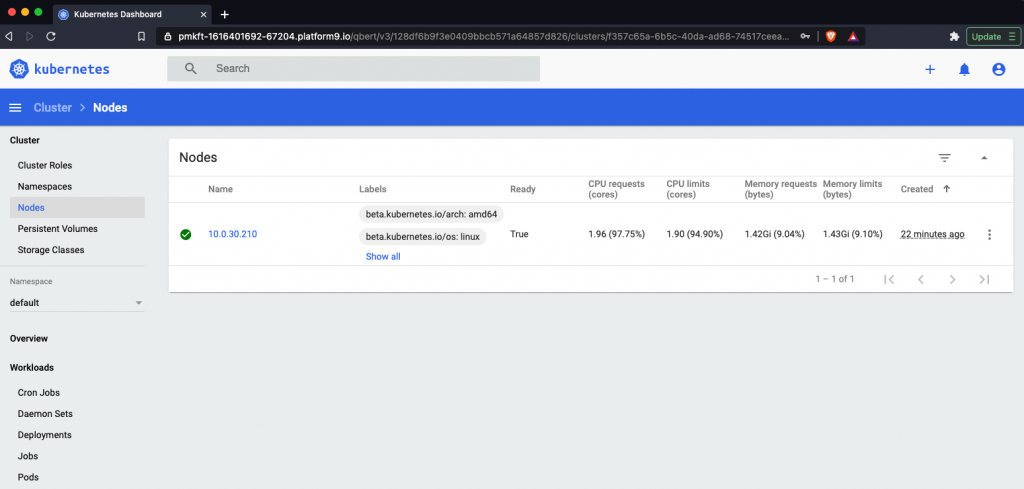
Accessing the Kubernetes Dashboard:
One of the most biggest next steps that lots of people find difficult when working with Kubernetes for the first time is exposing the Kubernetes Dashboard. Platform9 have built that mechanism right into the Web Console which proxies the connection through the portal. Through the Cluster Details from the top right box, you have the option to download the kubeconfig with either an authentication token set, or by using a username and password. Once the file is downloaded to your local machine you can feed that back into the Dashboard authentication page and gain access.
Conclusion:
Platform9 takes away a lot of the pain involved in getting a BareOS Kubernetes cluster up and running. For those looking to kick the tires with Kubernetes without wanting to spend cloud dollars, this is a great option because almost everything is done for you in terms of getting to a stage where you can start deploying applications. Platform9 doesn’t have the capability to deploy applications/pods through the Web Console, so all that will need to be done via kubectl connected to the server cluster instance. Note that while you can configure Storage Classes for persistent volumes through the Web Console, there is no CSI installed by default with the above, but i’ll be writing about that in another post shortly. Apart from that, being able to have MetalLB act as an easy Load Balancer also means you get applications published and exposed with relative ease. Remember that all this is free as part of the PMK Freedom Plan.
The Platform9 Managed Kubernetes Freedom Plan is our free-forever plan that provides access to many of the core features of Platform9 Managed Kubernetes. Enabling you to deploy, upgrade and manage your Kubernetes clusters from one central location. Freedom Plan supports up to 2 Clusters with a maximum of 10 nodes each (tip! 3 Masters + 7 Workers is a perfect combination) on BareOS, AWS and Azure.
1 Commentarchived